I'm anxiously awaiting delivery of my CT125 in a few weeks and starting to plan my accessory strategy.
I'd like to be able to somehow switch between a large passenger seat pad and the open rear rack.
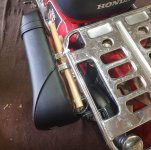
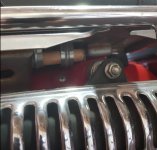
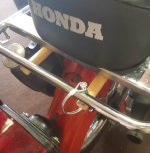
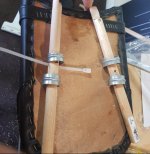
Can anyone share how the passenger seat pads are fastened to the rack?
I'm wondering if I could come up with some kind of a tool free quick release to easily switch between the two.
Or is it still easy to strap something like a milk crate down on top of the large seat pad and secure it to the rack rails underneath without removing the seat pad?
THANKS in advance!!
I'd like to be able to somehow switch between a large passenger seat pad and the open rear rack.
Can anyone share how the passenger seat pads are fastened to the rack?
I'm wondering if I could come up with some kind of a tool free quick release to easily switch between the two.
Or is it still easy to strap something like a milk crate down on top of the large seat pad and secure it to the rack rails underneath without removing the seat pad?
THANKS in advance!!