I wanted Hazard Flashers for those times when I'm on the road (or shoulder) flying along @ 45 mph and the rest of the world is doing 60.
This easy mod works great from trail to trail or to run to the store from the camp site.
In the Peoples Republic of California I've never had the authorities give me a second look running down the shoulder with 4 ways on.
The switch and weather proof boot are off the rack at Ace Hardware, about $12. I chose the switch w/wires attached for ease of installation
Note; I ordered 2 sets of weather proof push button switches off Amazon, but with all 4 switches the nuts were so loose on the plastic threads of the switches I was afraid they'd strip, so back they went.
The procedure went something like this;
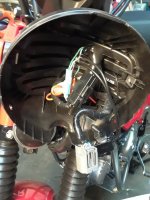
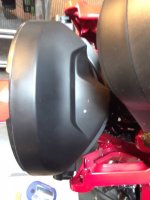
Remove headlight
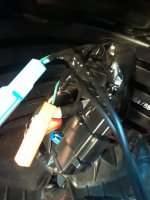
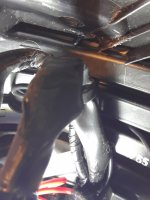
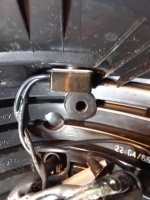
Locate L&R front two wire harnesses in bucket. (Orange & blue)
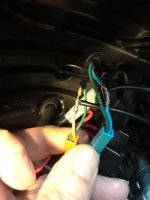
Use razor knife to strip away 1/2 in of insulation.
Strip back 1/2 in of wires from new switch and wrap around bared light wires . Wires can go to either color.
Solder or crimp connections.
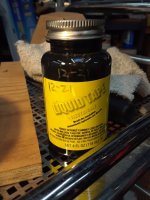
Tape or liquid tape bare connections.
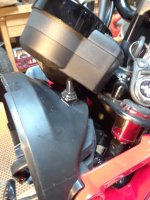
Removing bucket at this point made drilling and sw. install super easy.
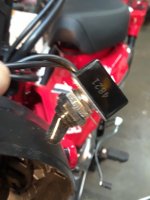
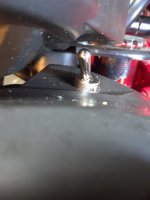
I placed my switch under speedo on flat spot of bucket and it worked perfectly. I had to shave a soft plastic support rib in bucket with razor for max clearance.
Optional- goop up top of switch at threads before inserting in hole and goop nuts after placement to insure weather tightness.
Turn key on, turn signal to either side, flip new Hazard sw. and Voila' Emergency Flashers.
CT125 Hazard Flasher Video
This easy mod works great from trail to trail or to run to the store from the camp site.
In the Peoples Republic of California I've never had the authorities give me a second look running down the shoulder with 4 ways on.
The switch and weather proof boot are off the rack at Ace Hardware, about $12. I chose the switch w/wires attached for ease of installation
Note; I ordered 2 sets of weather proof push button switches off Amazon, but with all 4 switches the nuts were so loose on the plastic threads of the switches I was afraid they'd strip, so back they went.
The procedure went something like this;
Remove headlight
Locate L&R front two wire harnesses in bucket. (Orange & blue)
Use razor knife to strip away 1/2 in of insulation.
Strip back 1/2 in of wires from new switch and wrap around bared light wires . Wires can go to either color.
Solder or crimp connections.
Tape or liquid tape bare connections.
Removing bucket at this point made drilling and sw. install super easy.
I placed my switch under speedo on flat spot of bucket and it worked perfectly. I had to shave a soft plastic support rib in bucket with razor for max clearance.
Optional- goop up top of switch at threads before inserting in hole and goop nuts after placement to insure weather tightness.
Turn key on, turn signal to either side, flip new Hazard sw. and Voila' Emergency Flashers.
CT125 Hazard Flasher Video
Attachments
-
 20230502_164624.jpg58 KB · Views: 33
 -
 20230502_164651.jpg53.8 KB · Views: 32
 -
 20230502_164704.jpg92 KB · Views: 31
 -
 20230502_165108.jpg70.3 KB · Views: 31
 -
 20230502_165116.jpg79.6 KB · Views: 30
 -
 20230503_135006.jpg53.6 KB · Views: 30
 -
 20230503_140529.jpg70.6 KB · Views: 28
 -
 20230503_142008.jpg46.6 KB · Views: 28
 -
 20230503_142048.jpg79.3 KB · Views: 29
 -
 20230503_143535.jpg82 KB · Views: 32