Today I installed a kickstand / side stand switch delete. When this switch functions as expected it prevents you from running the bike in gear with the kickstand down. As soon as the combination of being in gear and the kickstand down happens, it kills the motor. This is a safety feature so you don't drive off with the kickstand down scraping it, or go into a turn and have it plant into the ground and cause you to crash. Some reasons to eliminate this functionality are that the bike is an automatic, it's possible to have it in gear and on the kickstand without driving away, these switches can fail (especially with off road abuse) - eliminating the switch reduces the risk of getting stranded with a bike that turns off every time you put it in gear, and eliminating it cleans up a little bit of cabling and a bracket that sits by the front sprocket which can pack with grease.
This mod doesn't have to require a special part, you could just create a loop of wire to stick into the connector to complete the circuit, or cut the cabling in the existing side stand switch and patch it together to close the circuit.
I used the KITACO Side Stand Switch Canceller (Type-B) part number 676-9000910
There are other brands and other stores that sell the same type of part, for example: https://www.steadygarage.com/store/chimera-side-stand-switch-bypass-honda-grom-monkey-125-pcx
Type-B is a three pin connector with the wire bypass in the outer pin positions.
Tools used: Hex bit socket set (5mm), 10mm socket, 12mm socket, socket wrench, socket wrench extension, a small 2.5mm hex key I used to push the center of the push pin rivets to release them, and a swivel socket might make things easier but I didn't use one.
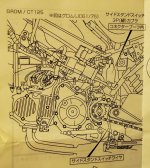
The instructions provided by Kitaco are in Japanese and don't provide step by step instructions, just a photo of what you're working with, which is also not accurate since it shows a slightly different cable path. Hopefully these photos are helpful to anyone doing the same mod, or considering doing it.
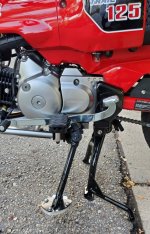
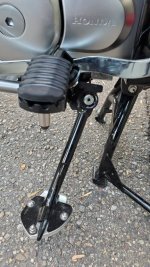
Bike on center stand with side stand down for reference, switch is mounted at the pivot point of the side stand.
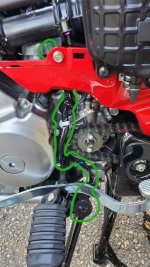
With the front sprocket cover off the black wire sleeve to the left of the front sprocket is the side stand switch wiring.
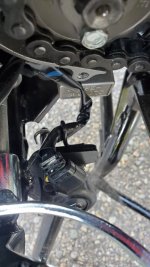
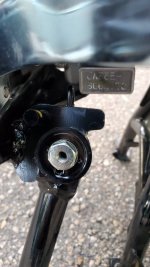
Looking down at the switch on the side stand pivot.
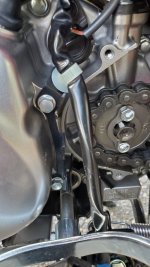
The black bracket to the left of the front sprocket holds the cable in place and out of the chain/sprocket area.
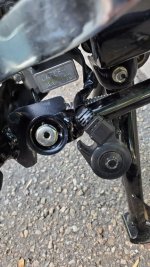
The side stand switch's pivot bolt threads into the hole of the side stand bolt, there is a bushing in the side stand switch which is why the bolt is long.
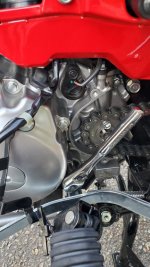
Putting the bolts back in after removing the side stand switch cable bracket is where a swivel socket might come in handy, it is hard to get to the bottom bolt without removing the shifter and footpeg assemblies. Luckily I was able to avoid this with a shallow enough socket and socket wrench (1/4")
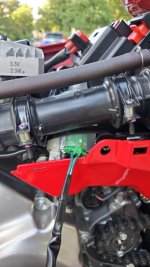
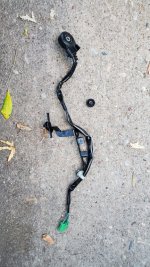
This green connector is where the side stand switch cabling plugs into the rest of the wiring harness. To get good enough access to unplug it I removed the battery lid, the main pipe lower cover (left), the air cleaner garnish, and the main pipe (left) side cover. These body panel names are from the manual. The air cleaner garnish needed to be removed because it has to come off for the main pipe side cover to come off as it sits on top of it at one bolt. The green connector is in a bundle of other cables and connectors that are bound with a clear plastic sleeve and a reusable black zip-tie. Press the zip-tie release to loosen it a bit, then slide the clear plastic sleeve upward to expose the connectors.
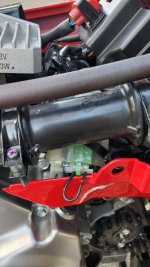
Here it is with the side stand switch cabling removed and the bypass plugged in.
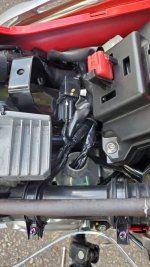
This shows the top of the clear plastic wiring connector sleeve for reference. It is shaped like the neck of a plastic bottle.
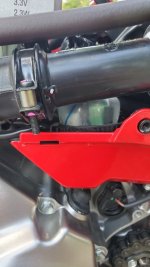
Here is the wiring all wrapped back up with the wiring connector sleeve pulled down and the reusable zip-tie tightened around it.
Continued in next comment due to file upload limit.
This mod doesn't have to require a special part, you could just create a loop of wire to stick into the connector to complete the circuit, or cut the cabling in the existing side stand switch and patch it together to close the circuit.
I used the KITACO Side Stand Switch Canceller (Type-B) part number 676-9000910
There are other brands and other stores that sell the same type of part, for example: https://www.steadygarage.com/store/chimera-side-stand-switch-bypass-honda-grom-monkey-125-pcx
Type-B is a three pin connector with the wire bypass in the outer pin positions.
Tools used: Hex bit socket set (5mm), 10mm socket, 12mm socket, socket wrench, socket wrench extension, a small 2.5mm hex key I used to push the center of the push pin rivets to release them, and a swivel socket might make things easier but I didn't use one.
The instructions provided by Kitaco are in Japanese and don't provide step by step instructions, just a photo of what you're working with, which is also not accurate since it shows a slightly different cable path. Hopefully these photos are helpful to anyone doing the same mod, or considering doing it.

Bike on center stand with side stand down for reference, switch is mounted at the pivot point of the side stand.

With the front sprocket cover off the black wire sleeve to the left of the front sprocket is the side stand switch wiring.

Looking down at the switch on the side stand pivot.

The black bracket to the left of the front sprocket holds the cable in place and out of the chain/sprocket area.

The side stand switch's pivot bolt threads into the hole of the side stand bolt, there is a bushing in the side stand switch which is why the bolt is long.

Putting the bolts back in after removing the side stand switch cable bracket is where a swivel socket might come in handy, it is hard to get to the bottom bolt without removing the shifter and footpeg assemblies. Luckily I was able to avoid this with a shallow enough socket and socket wrench (1/4")

This green connector is where the side stand switch cabling plugs into the rest of the wiring harness. To get good enough access to unplug it I removed the battery lid, the main pipe lower cover (left), the air cleaner garnish, and the main pipe (left) side cover. These body panel names are from the manual. The air cleaner garnish needed to be removed because it has to come off for the main pipe side cover to come off as it sits on top of it at one bolt. The green connector is in a bundle of other cables and connectors that are bound with a clear plastic sleeve and a reusable black zip-tie. Press the zip-tie release to loosen it a bit, then slide the clear plastic sleeve upward to expose the connectors.

Here it is with the side stand switch cabling removed and the bypass plugged in.

This shows the top of the clear plastic wiring connector sleeve for reference. It is shaped like the neck of a plastic bottle.

Here is the wiring all wrapped back up with the wiring connector sleeve pulled down and the reusable zip-tie tightened around it.
Continued in next comment due to file upload limit.
Last edited:

