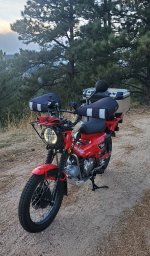
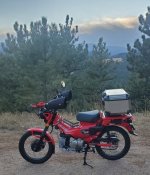
It's been dipping below freezing lately so I figured it was time to get some heated grips installed. I prefer factory accessory heated grips, but the Honda ones for our bike are supposed to plug into the accessory plug inside the headlight that is missing on USA (and some other) models and I wanted to keep the wiring simple, so went with Oxford heated grips knowing that others have run them in colder temperatures than I plan on riding in, and they've made it through 'round-the-world rides. Oxford grips also have a battery saving mode where if the battery voltage falls too low, or if it stops sensing the noise of the alternator on the circuit, it shuts the grips off to save the battery. This also means as long as you have a healthy charge on the battery then without having the key in the bike you can warm up the grips for 2 minutes before you're ready to start the bike. The Honda Trail has short grip length so the Retro grips seemed like a good fit. There are different styles of grips that have different cushion, grip pattern, and minimum and maximum lengths, where they start at the maximum length and you can trim them down to the minimum length. I also liked the Retro grip pattern for this bike.

 www.revzilla.com
First step was to remove the bar ends (I already removed the OEM ones when I installed Barkbusters).
If you don't want to keep the old grips you can just cut them off. The left grip is glued on, you can fit a screwdriver between it and the bar to break the glue free, or squirt some isopropyl alcohol between the grip and the bar to help dissolve the glue. Once removed you'll want to use some alcohol or acetone to remove the remaining glue.
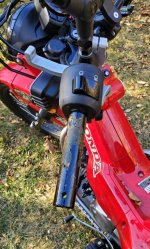
The right grip needs to be peeled away from a lip on the inner edge of the throttle tube. For both grips, once you get them loose it's best to squeeze the ends toward each other so they're not stretched tight on the bars, trying to just pull it off from one end will make it go tighter on the bars, same way a Chinese finger trap works.
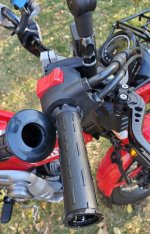
The heated grips have a stiff plastic center where they can't just stretch over the bumps and lips on the throttle tube, so it needs to be made smooth. You need to take the start/kill switch assembly apart with a screwdriver and then pull the throttle cable ends out of the throttle tube so you can remove it for safe modification.The instructions mention using a file for this. I used a Dremel, utility knife, and sand paper.
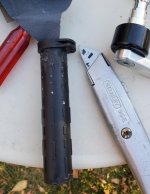
Test that the heated grip fits over the throttle tube (snug), then wipe down the throttle tube and reinstall it.
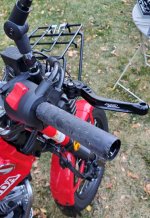
Do a test fit of the heated grips, making sure they slide all the way on, and then finding a cable position that works. The throttle side cable needs enough room to move without hitting anything, and you need to be able to squeeze the front brake without hitting it too. I used tape to mark the positions so they'd be easier to put back in place when gluing them without it being a rush against the time it takes the glue to cure.
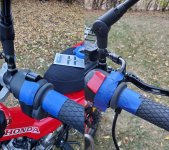
Take the grips off again, apply the included glue to the bar/throttle tube and/or inside of the grips, and slide them back into place. Be careful not to drip glue, and make sure the throttle side grip has enough gap to rotate without rubbing against the start/kill switch assembly. I wrapped the grips in more blue tape before gluing them to make sure none would get on the surface. If it did you could probably rub it off with some alcohol before it cures.
Fit your bar ends to see how the grips fit, should have enough gap to not rub against them. I trimmed the ends to the minimum length so they'd fit my Barkbusters bar ends well. They didn't need to be trimmed to the minimum length, maybe only half that amount, but cosmetically it was a good spot to cut them and easier to make a clean cut since that's where the plastic core inside of the grips sits which is a good stop for a blade.
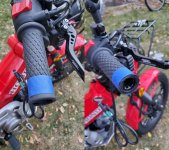
Reattach the bar ends, let the glue cure, then test the throttle and make sure it rotates smoothly.
For wiring, the connections are plugs that have weather covers that screw together. I plugged the grips and controller cables together behind the headlight assembly and tucked their excess cabling in there, then took the left side body panels off to pick up power at the battery terminal. There is an inline 5 amp fuse in the wiring.
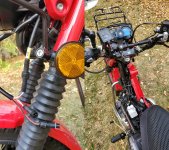
The controller mount plate it came with is supposed to attach to the mirror mount, but with the shape of the CT125's mirror mount it wouldn't have worked out well. I was able to attach it to the Barkbusters, but don't like how high it sits, so will likely either modify the plate or try the "Denali 2.0 Perch Switch Mount Kit" which I've read fits the controller. It's nice that the mount plate is black though, they used to be just unpainted stainless. It also came with double sided tape where you could stick it to any flat surface, so there are a few mounting options. The kit came with thin zip ties for securing the cabling, but I went with thicker ones I had on hand that grip cables better without being too tight and cutting into them.
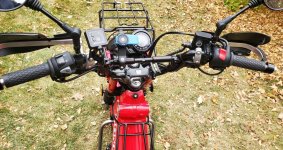
Anytime you work on hand controls, before riding the bike, turn the bike on and test all the controls (front brake, throttle) and turn the steering full lock side to side to make sure no cables, especially the throttle cable, are being pulled on anywhere within their operating range. If you turn the bars and the engine revs, something's pulling the throttle.
When battery saver mode is starting after turning off the engine it blinks the light for it.
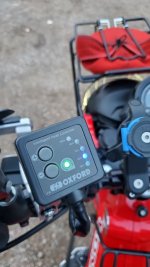
So far in 40 degrees with light gloves and Barkbusters, 50% heat was more than enough. 100% might give you sweaty palms.
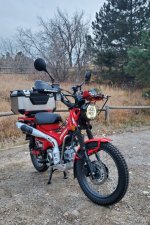
Hoping to get around to installing crash bars and aux lights before the next snow.

Oxford Heaterz Premium Retro Heated Grips - RevZilla
Crank up the heat with Oxford Premium Heaterz Grips. Choose between five different settings and focus on the road ahead, not how darn numb your finger…
 www.revzilla.com
First step was to remove the bar ends (I already removed the OEM ones when I installed Barkbusters).
If you don't want to keep the old grips you can just cut them off. The left grip is glued on, you can fit a screwdriver between it and the bar to break the glue free, or squirt some isopropyl alcohol between the grip and the bar to help dissolve the glue. Once removed you'll want to use some alcohol or acetone to remove the remaining glue.

The right grip needs to be peeled away from a lip on the inner edge of the throttle tube. For both grips, once you get them loose it's best to squeeze the ends toward each other so they're not stretched tight on the bars, trying to just pull it off from one end will make it go tighter on the bars, same way a Chinese finger trap works.

The heated grips have a stiff plastic center where they can't just stretch over the bumps and lips on the throttle tube, so it needs to be made smooth. You need to take the start/kill switch assembly apart with a screwdriver and then pull the throttle cable ends out of the throttle tube so you can remove it for safe modification.The instructions mention using a file for this. I used a Dremel, utility knife, and sand paper.

Test that the heated grip fits over the throttle tube (snug), then wipe down the throttle tube and reinstall it.

Do a test fit of the heated grips, making sure they slide all the way on, and then finding a cable position that works. The throttle side cable needs enough room to move without hitting anything, and you need to be able to squeeze the front brake without hitting it too. I used tape to mark the positions so they'd be easier to put back in place when gluing them without it being a rush against the time it takes the glue to cure.

Take the grips off again, apply the included glue to the bar/throttle tube and/or inside of the grips, and slide them back into place. Be careful not to drip glue, and make sure the throttle side grip has enough gap to rotate without rubbing against the start/kill switch assembly. I wrapped the grips in more blue tape before gluing them to make sure none would get on the surface. If it did you could probably rub it off with some alcohol before it cures.
Fit your bar ends to see how the grips fit, should have enough gap to not rub against them. I trimmed the ends to the minimum length so they'd fit my Barkbusters bar ends well. They didn't need to be trimmed to the minimum length, maybe only half that amount, but cosmetically it was a good spot to cut them and easier to make a clean cut since that's where the plastic core inside of the grips sits which is a good stop for a blade.

Reattach the bar ends, let the glue cure, then test the throttle and make sure it rotates smoothly.
For wiring, the connections are plugs that have weather covers that screw together. I plugged the grips and controller cables together behind the headlight assembly and tucked their excess cabling in there, then took the left side body panels off to pick up power at the battery terminal. There is an inline 5 amp fuse in the wiring.

The controller mount plate it came with is supposed to attach to the mirror mount, but with the shape of the CT125's mirror mount it wouldn't have worked out well. I was able to attach it to the Barkbusters, but don't like how high it sits, so will likely either modify the plate or try the "Denali 2.0 Perch Switch Mount Kit" which I've read fits the controller. It's nice that the mount plate is black though, they used to be just unpainted stainless. It also came with double sided tape where you could stick it to any flat surface, so there are a few mounting options. The kit came with thin zip ties for securing the cabling, but I went with thicker ones I had on hand that grip cables better without being too tight and cutting into them.

Anytime you work on hand controls, before riding the bike, turn the bike on and test all the controls (front brake, throttle) and turn the steering full lock side to side to make sure no cables, especially the throttle cable, are being pulled on anywhere within their operating range. If you turn the bars and the engine revs, something's pulling the throttle.
When battery saver mode is starting after turning off the engine it blinks the light for it.

So far in 40 degrees with light gloves and Barkbusters, 50% heat was more than enough. 100% might give you sweaty palms.
Hoping to get around to installing crash bars and aux lights before the next snow.

Last edited:

