What's new
Honda Trail 125 Forum

Welcome to the Honda Trail 125 Forum! We are an enthusiast forum for the Trail 125, Hunter Cub, CT125 or whatever it's called in your country. Feel free to join up and help us build an information resources for this motorcycle. Register a free account today to become a member. Once signed in, you'll be able to participate on this site by adding your own topics and posts, as well as connect with other members through your own private inbox!

STEDI ST4K Light Bar Installed

JTB

Member
Joined
May 23, 2022
Messages
27
Location
Washington
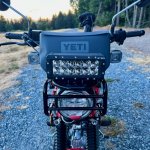
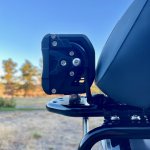
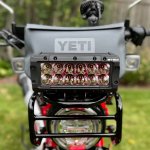
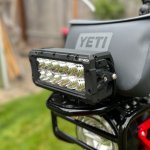
Even after weeks of designing a 3D printed mount, waiting for parts, installing the light, and sorting out electrical issues, it wasn't until I finally closed up the bike, took the cover off the light, and stood back ten feet that it finally dawned on me that I had over done it. This is way more light then is needed for safe driving. It is a night and day difference(sorry) compared to just the high beams. It puts a grin on my face every time I get to light it up, and I am now The Batman of my town.

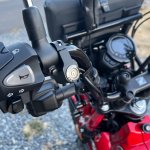
I have it wired to come on with the high beams when the handlebar switch is enabled. I am someone who could be characterized as having a stainless steel fastener fetish. But even to my taste the 25+ bright stainless fasteners holding this light together are excessive. I'm going to find some black stainless fasteners and replace most of them. This is a heavy light!

STEDI 8 Inch ST4K 12 LED Double Row Bar
STEDI Motorcycle LED Light Switch Handlebar Mount
6 Volt Automotive Relay

IMG_0620.jpegIMG_0621.jpeg
IMG_0619.jpeg
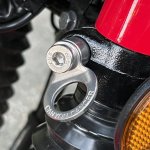
IMG_0622.jpegIMG_0623.jpegIMG_0624.jpegIMG_0633.jpeg
 
Last edited:

Harv

Member
Joined
Jul 14, 2022
Messages
48
Location
Memphis
Very nice set-up. I think you'd have a hard time convincing this crowd that anything is overkill.

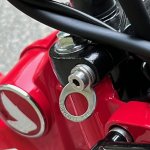
What are the two rings on the fork below the headlight for?
 

Harv

Member
Joined
Jul 14, 2022
Messages
48
Location
Memphis
Wow.

I clicked on the STEDI link and watched the night video of the 8" in action. Fantastic hybrid beam pattern.

I'm planning on mounting some aux lights on a crash bar coming in soon and saw your post about the 6V relay. Thanks for the heads-up.
 

STUBBORN

Active member
Joined
Apr 21, 2021
Messages
219

JTB

Member
Joined
May 23, 2022
Messages
27
Location
Washington
What size bolts did you have to buy? I just bought these and wanted to copy your install.

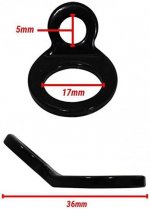
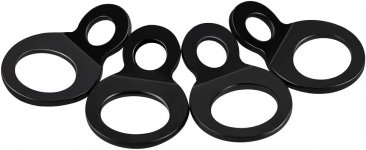
For the rings mounted to the bottom bridge(right above the fork boot) I used 50mm low profile socket head screws with 15mm spacers. That is the ring position I find most useful for tying to a motorcycle trailer. I used 40mm screws and a 6mm spacers on the top bridge. I haven't had any reason to use those rings yet. I choose the low profile head screws for aesthetic reasons. I sized them just long enough to get approximately the same thread depth as the stock screws considering the depth of the spacer and the thickness of the ring(longer would work too). Torque them to 29 N-m(spec for factory bolt).
 
Last edited:

HondaOG

New member
Joined
Jul 27, 2022
Messages
6
For the rings mounted to the bottom bridge(right above the fork boot) I used 50mm low profile socket head screws with 15mm spacers. That is the ring position I find most useful for tying to a motorcycle trailer. I used 40mm screws and a 6mm spacers on the top bridge. I haven't had any reason to use those rings yet. I choose the low profile head screws for aesthetic reasons. I sized them just long enough to get approximately the same thread depth as the stock screws considering the depth of the spacer and the thickness of the ring(longer would work too). Torque them to 29 N-m(spec for factory bolt).
JTB. I’m fascinated by the McMaster-Carr site you sent us to linking the socket screws and spacers you used to mount your tie down rings. I’d like to order more then just the hardware to add the tie down rings to my bike. My first thought is to order the proper fasteners for my rear cargo rack. What size do you recommend for that application? Seems as though they are M6 but the options are making my head spin. Thanks in advance.
 

MisterB

Active member
Joined
Apr 8, 2022
Messages
168
Location
Monroe County, Ill
HondaOG, the McMaster website is good, but if you can get their catalog it makes things a little easier and (for me) quicker. It's 3 inches thick printed on the thinnest paper possible but quite handy!
 

JTB

Member
Joined
May 23, 2022
Messages
27
Location
Washington
My first thought is to order the proper fasteners for my rear cargo rack. What size do you recommend for that application? Seems as though they are M6 but the options are making my head spin. Thanks in advance.

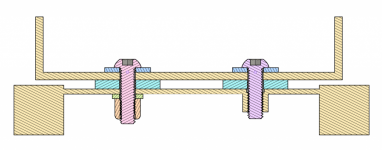
Here is an illustration of the general approach I would take to mount something on the Honda rack. On the right is a mount using the threads built-in to the Honda rack. On the left is how I would do it if I was drilling through the sheet metal of the Honda rack to create new mount points.

The blue are fender washers(or oversized washers as McMaster calls them). The turquoise are cushioning washers. The green is a standard washer. The orange is a nylon locknut. I would probably use button head socket screws here but you could use any head you prefer.
BoxMountOnRack.png
To get the screw length add the thicknesses of all the various washers and nuts, the thickness of the floor of your rack, and the thickness of the Honda rack(9mm at the built in threads) and then round up to the available screw length. Depending on the contours of the floor of your rack you might stack multiple cushioning washers(or fender washers) on top of one another as needed to prevent your rack from rubbing against the Honda rack in a way you didn't intend.

McMaster is great for their selection of hard to find parts which can be quickly delivered. But they are on the expensive side. Other than the cushioning washer, the parts I have mentioned are widely available. When I need standard nuts and bolts(especially in low qty), and I'm not in a rush, I use BoltDepot.com. Hope that helps.
 
Last edited:

HondaOG

New member
Joined
Jul 27, 2022
Messages
6
Here is an illustration of the general approach I would take to mount something on the Honda rack. On the right is a mount using the threads built-in to the Honda rack. On the left is how I would do it if I was drilling through the sheet metal of the Honda rack to create new mount points.

The blue are fender washers(or oversized washers as McMaster calls them). The turquoise are cushioning washers. The green is a standard washer. The orange is a nylon locknut. I would probably use button head socket screws here but you could use any head you prefer.
View attachment 3344
To get the screw length add the thicknesses of all the various washers and nuts, the thickness of the floor of your rack, and the thickness of the Honda rack(9mm at the built in threads) and then add at least another mm and round up to the available screw length. Depending on the contours of the floor of your rack you might stack multiple cushioning washers(or fender washers) on top of one another as needed to prevent your rack from rubbing against the Honda rack in a way you didn't intend.

McMaster is great for their selection of hard to find parts which can be quickly delivered. But they are on the expensive side. Other than the cushioning washer, the parts I have mentioned are widely available. When I need standard nuts and bolts(especially in low qty), and I'm not in a rush, I use BoltDepot.com. Hope that helps.
That’s a really impressive illustration and description. Thank you!
 

SneakyDingo

Well-known member
Joined
Aug 6, 2021
Messages
1,573
🤯 Here I was, modeling up the individual McMaster Carr components like an idiot, as opposed to using the F360 import library to bring in the McMaster Carr supplied CAD models.
 
  • Like
Reactions: JTB

STUBBORN

Active member
Joined
Apr 21, 2021
Messages
219
Top